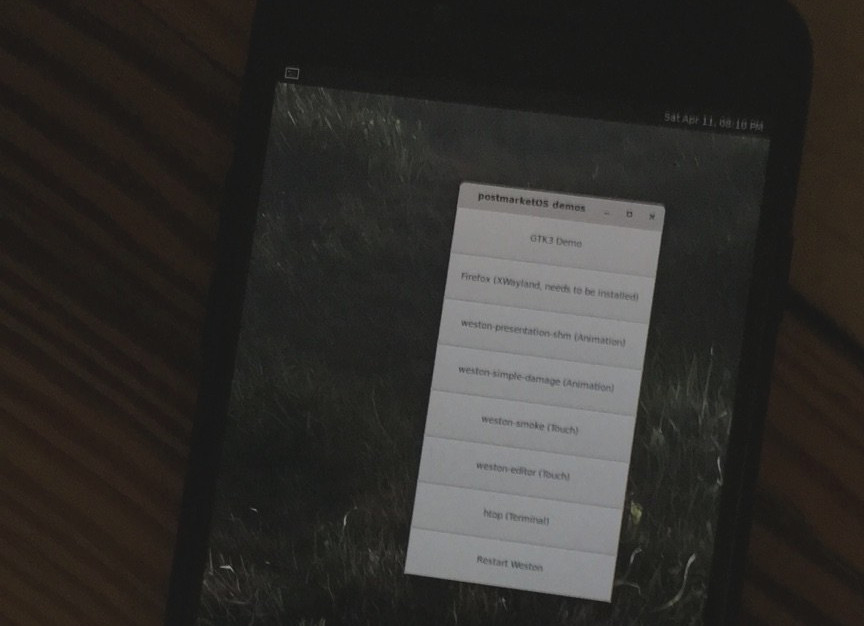
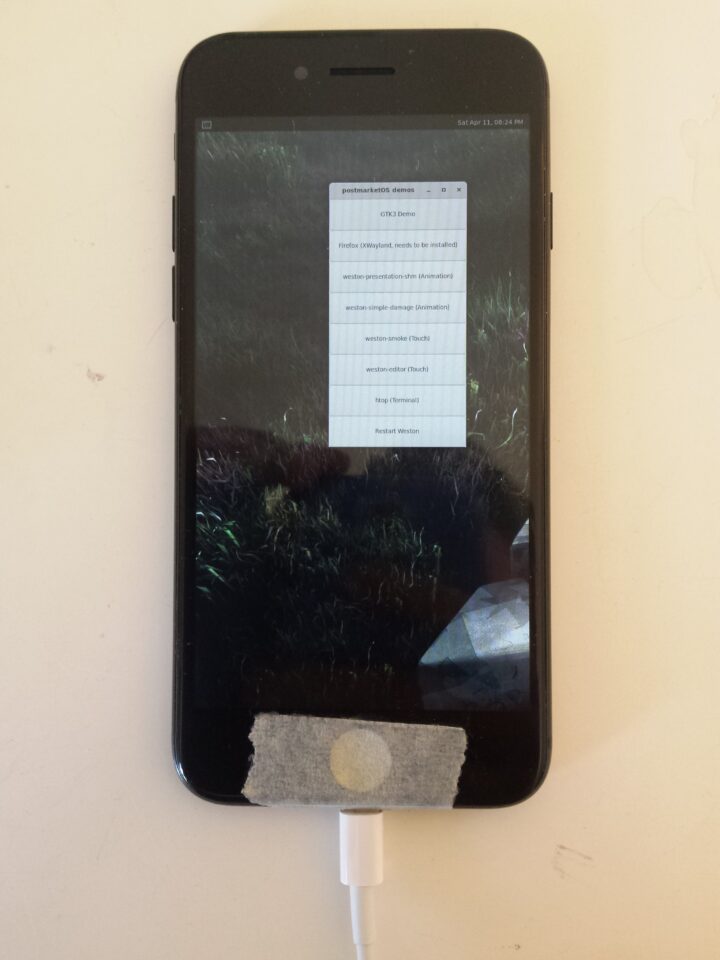
Since the last post about running postmarketOS Linux on iPhone 7, I was finally able to mount and run larger and persistent system images from the iPhone system memory. Therefore I used the same technique Corellium was using in their Android build for the iPhone 7. Further, ephemeral write support for postmarketOS is achieved by using OverlayFS.
As you can see in the image above, the Linux distribution is now able to launch every sort of graphical window manager, for example Weston.
Now if you want to try this on your own phone, here’s a complete new step by step guide which should work on most Linux desktops.
Preparing postmarketOS image
Let’s start with compiling the base image using the postmarketOS utility pmbootstrap.
pmbootstrap init
# Work path [/home/onny/.local/var/pmbootstrap]
# Vendor: qemu
# Device codename: aarch64
# Kernel: virt
# User interface: weston
pmbootstrap install
During the initialization, you can leave most of the variables as they are. As an example we’re choosing Weston as the user interface. After installation we have to change a configuration and run the install process again.
pmbootstrap chroot -r
# vi /etc/xdg/weston/weston.ini # change one variable
# [...]
# backend=fbdev-backend.so
# [...]
pmbootstrap install
We have to extract the initramfs and add our custom filesystem mounting procedure into the init script.
pmbootstrap initfs extract[...]
mount_root-partition
/bin/mkdir -p /mnt/apfs /mnt/ro /mnt/rw
/bin/mount -t apfs -o ro,relatime,vol=5 /dev/nvme0n1p1 /mnt/apfs
/sbin/losetup /dev/loop0 /mnt/apfs/qemu-aarch64.img -o 60817408 -r
/bin/mount -t ext4 -o ro /dev/loop0 /mnt/ro
/bin/mount -t tmpfs tmpfs /mnt/rw
/bin/mkdir -p /mnt/rw/data /mnt/rw/work
/bin/mkdir -p /sysroot
/bin/mount -t overlay -o lowerdir=/mnt/ro,upperdir=/mnt/rw/data,workdir=/mnt/rw/work overlay /sysroot
init="/sbin/init"
[...]There are two variables in the code snippet above. First there is the parameter vol=5 which specifies the target APFS volume we’ll create later on. If you already created more custom volumes on your phone, this value is probably higher. Secondly losetup specifies an offset -o 60817408 which represents the offset in bytes for the ext4 system partition inside the image. You can calculate this offset by multiplying sector size and start sector using fdisk.
Recompress the initramfs for the kernel.
cd ~/.local/var/pmbootstrap/chroot_rootfs_qemu-aarch64/tmp/initfs-extracted/
sh -c "find . | cpio  --quiet -o -H newc | gzip -9 > /tmp/ramdisk.cpio.gz"
Compiling the kernel with custom ramdisk
The following part is similar to the old guide but this time we’re using the initramfs image of pmbootstrap directly.
pacman -S aarch64-linux-gnu-gcc
cd /tmp
git clone https://github.com/corellium/linux-sandcastle.git
cd linux-sandcastle
export ARCH=arm64
export CROSS_COMPILE=aarch64-linux-gnu-
make hx_h9p_defconfig
cp /tmp/ramdisk.cpio.gz .
make -j4
./dtbpack.sh
lzma -z --stdout arch/arm64/boot/Image > arch/arm64/boot/Image.lzma
Flashing system image and kernel
Be careful, the following steps are considered safe to use but this is still experimental and could brick your phone. Use it at your own risk!
This is not “flashing” in the traditional sense but now we’re going to use the bootrom exploit checkra1n to gain ssh root access on the phone. Put your phone into DFU mode and run following command:
checkra1n -cE
iproxy 2222 222 # leave this running while accessing via ssh
sshpass -p "alpine" ssh -p2222 root@localhost
Inside the iPhone root shell, we’re going to create a new APFS volume and mounting it. You have to do these steps only once, just remount the partition if you want to delete or overwrite the existing system image.
newfs_apfs -A -v postmarketOS -e /dev/disk0s1
mkdir -p /tmp/mnt
mount -t apfs /dev/disk0s1s6 /tmp/mnt
The volume /dev/disk0s1s6 should be the new “postmarketOS” volume. You can check this with /System/Library/Filesystems/apfs.fs/apfs.util -p /dev/disk0s1s6.
Now we can transfer the system image inside the new volume using scp.
sshpass -p "alpine" scp -P2222 -v ~/.local/var/pmbootstrap/chroot_native/home/pmos/rootfs/qemu-aarch64.img root@localhost:/tmp/mnt/After that, unmount the partition on the iPhone and put it back into DFU mode. The following commands will run the Linux kernel and trigger the boot process up into our graphical user session :)
cd /tmp
git clone https://github.com/corellium/projectsandcastle
cd projectsandcastle/loader
make
checkra1n -cpE
./load-linux ../../linux-sandcastle/arch/arm64/boot/Image.lzma ../../linux-sandcastle/dtbpack
If you want to reboot into your postmarketOS system, you jsut have to rerun the last two commands. Changes made while running the system will be lost on reboot and are not yet persistent.
Shell access via USB serial
Since all this is in development state, it is convenient to have serial/shell access to the running system. Therefore you should add CONFIG_USB_G_SERIAL to the kernel configuration and append following line the the inittab file on the postmarketOS target root filesystem.
ttyGS0::respawn:/sbin/getty -n -l /bin/sh ttyGS0 9600 linuxDuring the next boot you’ll be able to access your phone, for example with minicom, at /dev/ttyACM0.
To be continued
From here on it should be easy to enable Bluetooth and Wifi since it is already implemented by Corellium into their custom Kernel.
Drop me a mail if you have further question or want to support this project.
Update 21/07: This post got featured on the postmarketOS podcast episode 7 (archive).


This is incredible. I feel like the next post you’ll make is that you can make phone calls and send SMS and MMS.
Keep up the best work!
For some reason I can’t get this to work. Every time I try I get “Boot partition not found”. Could it be because I’m keeping the losetup offset as 60817408? What device do I calculate the offset on?
@Jordan: I calculate the offset like this:
sfdisk -l ~/.local/var/pmbootstrap/chroot_native/home/pmos/rootfs/qemu-aarch64.img
Which should return a table like this:
Device Boot Start End Sectors Size Id Type
~/.local/var/pmbootstrap/chroot_native/home/pmos/rootfs/qemu-aarch64.img1 * 2048 118783 116736 57M 83 Linux
~/.local/var/pmbootstrap/chroot_native/home/pmos/rootfs/qemu-aarch64.img2 118784 1171455 1052672 514M 83 Linux
The first partition starts at sector 2048. According to sfdisk, the sector size is 512. So 2048*512 = An offset at 1048576 bytes. Maybe this offset could change with every image creation. I haven’t checked this yet.
If you’re able to debug your initramfs environement via Serial as described in the post you could also check if the APFS volume is correctly mounted and if the target image is present.
Hi. it’s kind of difficult to follow this tutorial, and I would love Linux with Wayland in my phone , but can you please make a YouTube tutorial on how to install Linux with Wayland in the iPhone 7? thanks.
@Xorg: That would be cool. I guess there are several ways to automate most of the steps, for example if we package the iPhone Linux kernel within postmarketOS. Hopefully I will soon find some time to update this tutorial to make it easier to follow.
@onny sounds great! I hope soon you will update the tutorial to make it easier. and would be better if you could make a youtube tutorial. and maybe I can create a script.sh that could do all the stuff for users to boot their iPhone 7/7+/iPod nano 7th gen to postmarketOS. this would mean alot to me if you create a YouTube tutorial or update the tutorial in this post to make it easier. but don’t forget you can take your time to update the tutorial in this post or make a youtube tutorial. I will be patient.
Thanks for your work!
Is there any progress? Haven’t find newer articles.
Would it be possible to run Linux on older devices like iPad 4 or even iPod Touch 4?)
@Andrey: Thanks for your feedback. Haven’t been working on this any further. I was hoping for new kernel releases by Corellium but they didn’t released anything yet :(
There have been ports of older kernels for some early iPad and iPhone devices. But they seem to be discontinued.
hi onny. your project is insane!, running linux in iPhone. but the work, it is a hard for me and i like to try it in my iphone 7. so can you post download links for compiled files, “qemu-aarch64.img” “load-linux” “Image.lzma” and “dtbpack” ? i am a sorry for asking for many files. i do not force you for you to create download links. your choice :) once again, very good project! (sorry for my terrible english)
@chang: hm it’s difficult to find all files again and upload them. have you tried to compile everything on ubuntu (live or in a virtual machine)? i could help out with this :)
hi onny. thanks for responding! :) sorry for late response. i try to compile in vm. thank you. (again sorry for terrible english)
hi onny. i am creating postmarket image, but i run into some error when i perform
“make -j4”
in /tmp/linux-sandcastle: https://pastebin.com/raw/cL3MLh8t
i did “make -j4” in arch terminal.
i hope you can tell me a solution. if onny cannot then anyone who want to help can give me (i do not force anyone including onny to be giving me a solution) so i hope anyone can tell me a solution. thank you!
@chang: Thanks for trying out and I really would like to help with this :) Could you check which version of “dtc” you have installed?
The package is called “device-tree-compiler” and you should have version 1.6.0 installed https://packages.ubuntu.com/search?suite=default§ion=all&arch=any&keywords=device-tree-compiler&searchon=names
At least thats the version I’ve used. Probably older versions of Ubuntu have older versions of dtc. You should try to upgrade the package :)
hi onny. thanks for responding! i am in arch linux and not in ubuntu linux, i am in arch wsl (yuk7/archwsl) I have dtc 1.6.0 in my arch, when i do ‘make -j4′ i recive same error:
/usr/sbin/ld: scripts/dtc/dtc-parser.tab.o:(.bss+0x20): multiple definition of `yylloc’; scripts/dtc/dtc-lexer.lex.o:(.bss+0x0): first defined here
collect2: error: ld returned 1 exit status
make[1]: *** [scripts/Makefile.host:116: scripts/dtc/dtc] Error 1
make: *** [Makefile:1263: scripts_dtc] Error 2
make: *** Waiting for unfinished jobs….
again i hope onny (or anyone who can help) can tell me a solution, again i do not force for a solution :)
Hi, great work! is there a sure way to return back to ios after doing this?
@Ahmed: Thanks. I guess it’s always safe to do backups so in case something gets lost you can recover your phone. Otherwise it is relatively safe since you’ll have to create only a virtual APFS partition/container without affecting the root filesystem.
@onny: should I compile the arch image in arm64? thanks.
@xorg: sounds good yes, or aarch64
@onny: I have another question:
so in ubuntu, the package isn’t called “aarch64-linux-gnu-gcc” it’s called “gcc-aarch64-linux-gnu” so is it possible to export like:
“export CROSS_COMPILE=gcc-aarch64-linux-gnu”
or “export CROSS_COMPILE=-aarch64-linux-gnu”
I don’t know the export for ubuntu, so can you please tell me how to export the cross compile for “gcc-aarch64-linux-gnu”? thanks.
One more thing: I don’t need a tutorial for running postmarket on iphone anymore, I know now.
@xorg I’m not sure about this but I guess it’s possible to find this on Goolge :)
hi, whenever i try to mount /dev/disk0s1s6 to /tmp/mnt
i get the mount_apfs: volume could not be mounted: Resource busy
mount: /private/var/tmp/mnt failed with 75
error.
@among us: Hey :) It is possible that the newly created virtual volume/partition might have an other name. See which new volume appears in /dev after running the command newfs_apfs -A -v postmarketOS -e /dev/disk0s1
I am trying to install ubuntu arm and I don’t know how to do it, could you make a guide?
@Daniel: There are already other instructions on how to run Ubuntu on the iPhone 7. This guide is primarily about postmarketOS :)
Does the USB port work? Is it possible to plug in a USB adaptor and use a regular mouse & keyboard
@feisow: I would say yes and as far as I remember I’ve used a USB keyboard on the phone. Further hardware support is listed here https://projectsandcastle.org/status
do you have Image.lzma?
because I have many error.. :(
Not anymore, sorry. But I would like to integrate this into postmarketOS so all this stuff will get compiled and flashed automatically https://wiki.postmarketos.org/wiki/Apple_iPhone_7/7%2B_(apple-iphone7)